
8 Tips For Getting Rid Of Mould Under Flooring
Steps you need to take to remove mold under the existing flooring
Your flooring may look stylish and beautiful and may feel warm and cosy, not to mention the added aesthetic appeal to your home. However, just because it looks flawless and majestic on the outside doesn’t mean there are no ongoing problems underneath. Unfortunately, among the many issues many homeowners face is mould infestation. Mould can grow and infest everywhere in your house as long as moisture or an organic material is present. So, if you often drop food crumbs on the floor or wet the floor after stepping out of the shower, you’re boosting the risk of your flooring being infested by moulds.
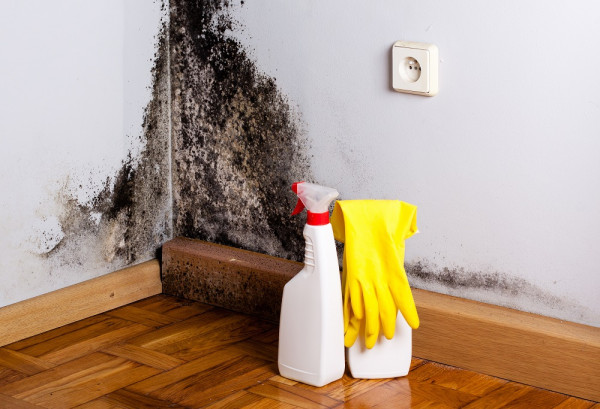
Aside from being an eye-sore, mould growth can be detrimental to your flooring and everyone’s health. It could spread and require you to replace your entire flooring when left unresolved. What’s worse, it can also cause respiratory problems in everyone in the house. Thus, if you see the first sign of mould growth, you need to book an inspection from a mould removal specialist and work on eliminating mould immediately.
Here are eight tips for getting rid of mould under your flooring for your guide.
1. Clear the room with the infested flooring
Before you or the mould removal experts begin the operation, it’s best to declutter the space first or the entire room with the infested flooring. See that your rugs, upholstery, room furnishings and other items are uncontaminated before taking them away. Meanwhile, for the infested items, like your garbage bags, floor fabrics, carpets or anything that moulds have spread, you can dry them out in the sun or throw them away if they’re replaceable items.
2. Seal the infected room from the rest of the house
Now that you know you have moulds infesting your flooring, you must take precautions to avoid spreading the spores to the rest of the house and further contaminating the unaffected areas. Thus, during mould removal, make sure to seal the room with contaminated flooring from the rest of the house.
You can use plastic sheeting, hang it over your doors and seal it using duct tape or nails. You’re also encouraged to open the windows to promote ventilation and, preferably, have an electric fan turned on and pointed outwards. As much as possible, avoid blowing direct wind at the mouldy flooring to prevent the spores from being disturbed and released.
3. Take out the floorboard of the infested area
With the help of the mould removal experts, pry away the baseboard wall trim of your hardwood flooring to better access the contaminated floorboards. You can also remove the existing transitional floor trim until you’ve unwrapped all the mould. It’s also ideal to include at least one to two extra feet of the floor section to be safe and ensure that you’ve uncovered all the infested flooring.
Don’t hesitate to remove more sections if you still find small pieces of evidence of mould around the area. Once you’ve uncovered all the infested area, immediately spray it with water to keep the spores from flying all over the room.
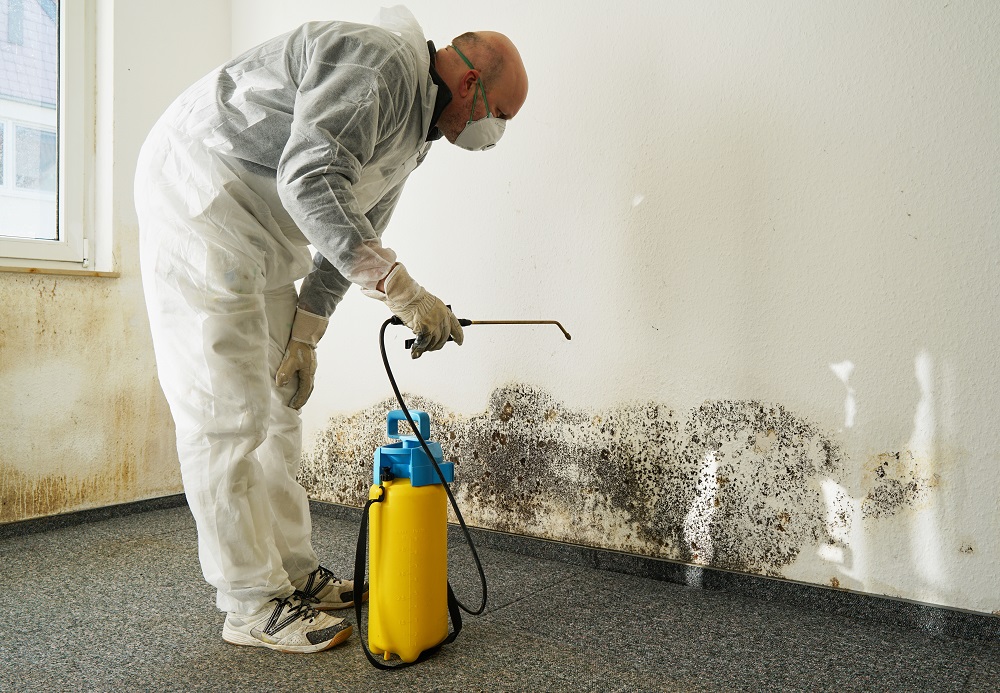
4. Wear personal protection gear during the mould removal process
If you’ve noticed, mould removal experts wear full costumes of personal protection gear to avoid contaminating themselves with moulds or inhaling the spores, which can bring adverse health effects. Thus, you must also do the same and, depending on the moulds you’re removing, you must wear proper protective equipment – such as gloves, face masks, washable clothing, eye protection glasses, etc. These things will protect you from the toxic spores that will likely be released during the removal process.
5. Inspect your hardwood floorboards
Check each floorboard and see if they’re in great shape or if you notice any signs of warp, rot, or discolouration. To avoid mould cross-contamination, make sure to separate the healthy and undamaged floorboards from the rotten ones.
6. Treat the floorboards and subfloor with borax solution
To remove the mould, you’ll need to mix a cup of borax with a gallon of water. This borax solution is known to help impede the growth and spore production of moulds. Aside from your flooring, you can also use this to clean and remove mould from wood and metal surfaces. After mixing, place the borax solution on a spray bottle and sprinkle it on the mouldy flooring. Leave it for one to two hours before rinsing it with distilled water to eliminate the mould.
When rinsing, you can scrub the floor with a brush to get rid of mould. You can reapply the solution for the second time and repeat the process. During that time, the borax solution may have killed all moulds. Lastly, remove all the dead mould using a vacuum or a disposable rag dipped in the borax mixture.
7. Spray the remaining uncontaminated floorboards and subfloor with the borax solution
Supposed, you successfully removed all the moulds from the infected flooring. This time, you can spray the borax solution to the remaining uncontaminated floorboards and subfloor. Preferably, leave the solution to dry for at least one to two days, as the borax will help prevent any re-infestation. Meanwhile, you can get new floorboards and replace them for the damaged flooring you may have thrown away.
8. Get the help of a professional mould removal service
The tips above should be enough to get rid of basic mould problems in your flooring. However, if the mould has spread too much in your entire house’s flooring or has penetrated through the floorboards, your best option is to call a professional mould removal service. They have the necessary tools and skills to deal with large-coverage mould infestation.
Key takeaway
While mould is a natural part of the life cycle, it can pose serious threats to your property and overall health. Thus, if you find one small sign of mould growth, take these safety precautions seriously or call a mould removal specialist to inhibit further mould growth and production.